Although the Raspberry Pi OS is designed and optimized to run in the Raspberry Pi module, is possible to test and use it without its hardware, with VMware. Running Raspberry Pi OS in a Virtual Machine can be useful if you are a developer (or just a curious guy) and don't have a Raspberry Pi module with you. Also, if you want to experiment without breaking your installation on the SD card.
About Raspberry Pi OS
Raspberry Pi OS, formerly known as Raspbian, is packed with plenty of software for education, programming, and general use. It has Scratch, Python, Sonic Pi, Java, and more. Its OS is a distribution of Debian Linux, just like Ubuntu. So if you are familiar with Ubuntu, the Raspberry Pi OS should be friendly to you.
There are several ways to virtualize the Raspberry Pi module. You can emulate the module with QEMU, a free and open-source emulator and virtualizer that can perform hardware virtualization. It also can be used with Kernel-based Virtual Machine (KVM) to run virtual machines at near-native speed.
However, the best option is to use a more recognized open-source hypervisor such as VirtualBox or VMware Workstation. If you are familiar with this website, you know that we are going to use VMware. :). Let's run Raspberry Pi OS in a Virtual Machine with VMware.
Raspberry Pi OS on VMware Workstation
Step 1: Download
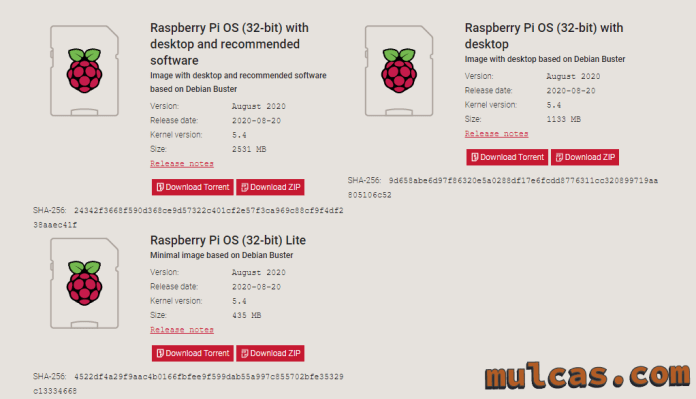
The first thing is to download Raspberry Pi OS from the link below. Select: Raspberry Pi OS (32-bit) with desktop and recommended software. The recommendation is to use the torrent file.

After downloading the ISO, it would be good to verify the file's integrity. For doing so, take a look at this article.
Files Integrity Check Using Cryptographic Hashes
Step 2: Create a New VM in VMware Workstation
Note: For this post, I will skip these elementary steps (images), assuming that you are familiar with VMware Workstation.
During the virtual machine creation, select:
- Select Typical
- Mount the disc image
- Select Linux as OS, Debian 10x as version.
- Name the VM and verify the location.
- Leave Specify Disk Capacity by default.
- Review and Finish.

Step 3: Raspberry Pi OS - Install
Power On the VM
Select Graphical Install. The most user-friendly option, it lets you use a mouse to select options.
What is Persistence:
- Run with persistence runs the Raspberry Pi OS from the USB stick, with a separate partition where data can be saved. When you reboot, you don't start from zero.
- Run and reset persistence wipes the persistence partition during boot, so you can start over.
- Run without persistence would be useful to boot and test Raspberry Pi OS on your hardware before installing.

Configure the Keyboard language of your choice. Click Continue, and the installation wizard will start.
Under Partition disks, select Guided - use entire disk.

In the new menu, select the partition disk. Then, select All files in one partition (recommended for new users). In the next menu, select Finish partitioning and write changes to disk. Under Write the changes to disks?, select Yes. Click Continueto start the installation.

Under Install the GRUB boot loader to the master boot record?, select Yes. Then select /dev/sda. Click Continue.

Remove the installation media (ISO), and Click Continue to finalize the installation. The VM will be rebooted.

Step 4: Raspberry Pi OS in a Virtual Machine - Initial Set-Up
After the VM is rebooted, you will see the Raspberry Pi Desktop welcome wizard. Click Next.

Here, set country, language, and time zone.

Enter Password.

Next, update the software. Depending on your downloaded file, this will take about 15 min. You can also skip this step and update the OS later from the terminal, using: sudo apt update and sudo apt full-upgrade.
Note: Before doing this, make sure you have connected the VM to the internet. Go to the VM setting and change the network if necessary.

After the update is completed, restart the system.

We are now emulating the Raspberry Pi OS in a VM.

The next step is installing VMware Tools. Follow this blog post: How to install VMware Tools in Raspberry Pi OS - Linux Debian.


Hi: You forget to mention, that this only works with the “Raspberry Pi Desktop for PC”-ISO – the standard-images for native PI do NOT run because these are compiled for ARM-architecture, which is not supported by VMWare.
the file is corrupted
Hi, can you be more specific? Which file is corrupted?
So do I understand correctly – these are the version of RPI OS compiled for x86 architecture and thus do not have any support for peripherals, low level access to registers and interrupt controller of original SoC, and only replicate the look and feel of RPI OS?